Cart
0
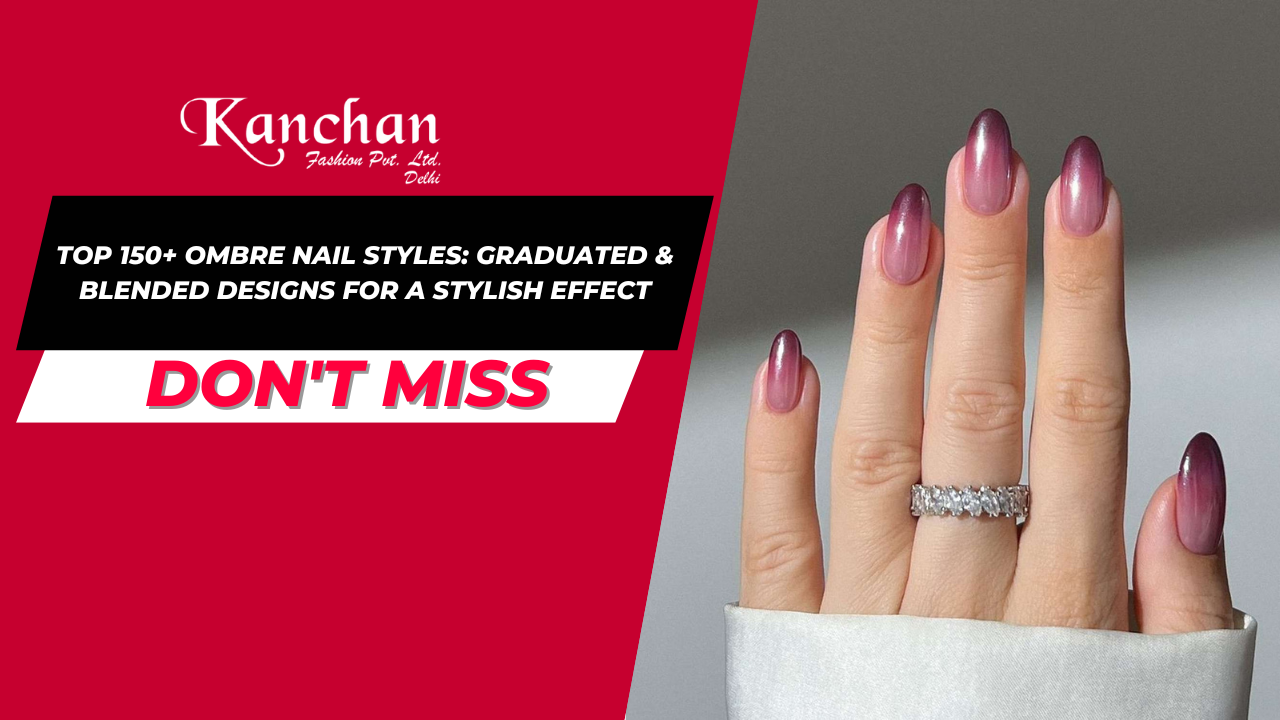

Table of Contents:
- Introduction: The Allure of Ombre Nails
- What Exactly are Ombre Nails? A Definition and Explanation
- The Timeless Appeal: Why Ombre Nails Remain Popular
- DIY vs. Salon: Weighing Your Ombre Options
- Essential Tools and Materials for DIY Ombre Nails
- The Classic Horizontal Ombre: A Gentle Gradient
- Vertical Ombre: A Lengthening Illusion
- Diagonal Ombre: Adding a Touch of Edge
- Reverse Ombre: Dark to Light at the Tip
- Double Ombre: A Symphony of Two Gradients
- Glitter Ombre: Sparkling Transitions
- Chrome Ombre: A Futuristic Sheen
- Matte Ombre: Sophisticated Subtlety
- Neon Ombre: Bold and Vibrant Statements
- Pastel Ombre: Soft and Dreamy Hues
- Nude Ombre: Effortless Elegance
- French Ombre (Baby Boomer Nails): A Modern Twist on a Classic
- Water Marble Ombre: Unique and Artistic Blends
- Airbrush Ombre: Seamless and Professional Finishes
- Ombre with Nail Art Accents: Elevating the Design
- Caring for Your Ombre Manicure: Longevity Tips
- Choosing the Right Color Combinations for Your Ombre
- Ombre Nails for Different Nail Shapes and Lengths
- The Influence of Trends on Ombre Nail Styles
- Stepping Up Your Ombre Game: Advanced Techniques Conclusion: Embrace the Endless Possibilities of Ombre Nails FAQs: Your Burning Ombre Questions Answered
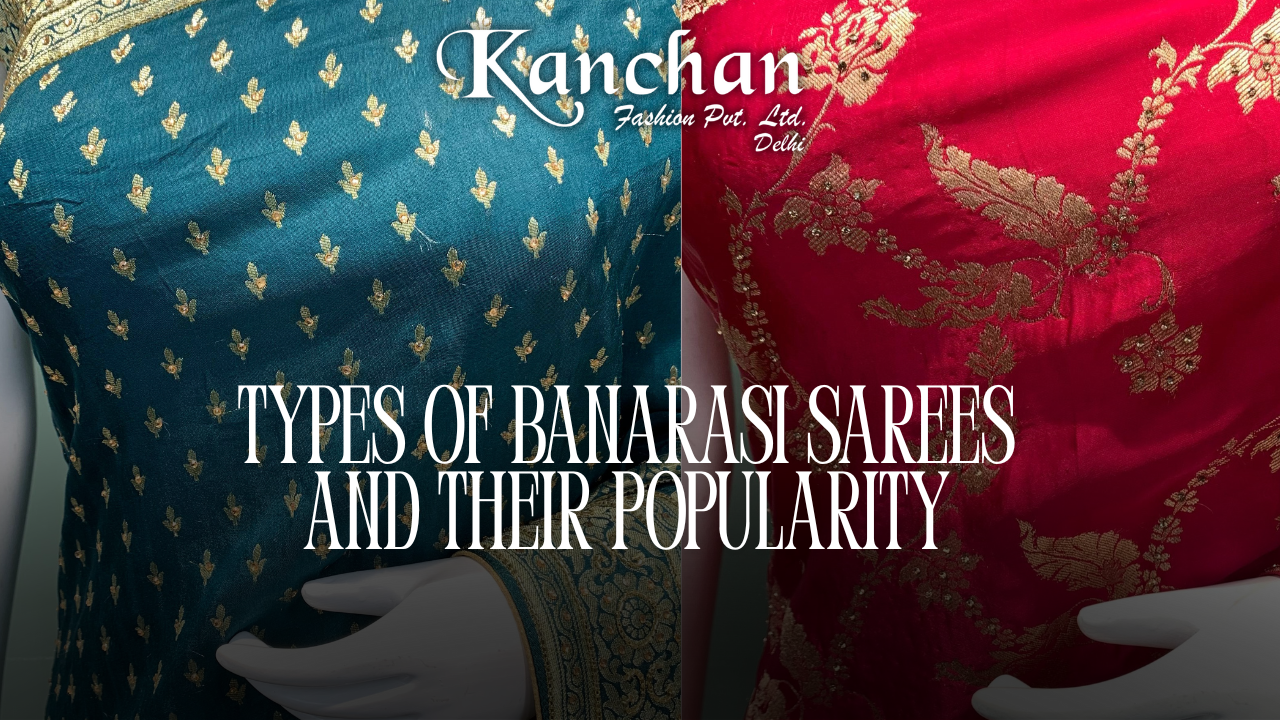
Top 150+ Ombre Nail Styles: Graduated & Blended Designs for a Stylish Effect


1. Introduction: The Allure of Ombre Nails
In the ever-evolving world of nail fashion, where trends come and go with the seasons, one style has consistently captivated enthusiasts with its seamless beauty and versatile appeal: the ombre nail. More than just a simple gradient of color, ombre nails represent an art form, a delicate dance of hues blending together to create a visually stunning and often mesmerizing effect. From subtle and sophisticated transitions to bold and vibrant statements, the ombre technique offers a canvas for endless creativity and personalization. Whether you're a seasoned nail art aficionado or someone looking to elevate your manicure game, understanding the allure and the myriad of possibilities within the ombre realm is the first step towards unlocking a world of stylish self-expression. This comprehensive guide will delve deep into the fascinating universe of ombre nails, exploring its definition, its enduring popularity, various techniques, design ideas, and essential tips to achieve and maintain the perfect graduated and blended look. Prepare to be inspired by over 150+ ombre nail style ideas that will ignite your imagination and empower you to create your own signature nail statements.
2. What Exactly are Ombre Nails? A Definition and Explanation
At its core, the term "ombre" originates from the French word for "shaded" or "shadow." In the context of nail art, ombre refers to a technique where two or more colors are seamlessly blended together, creating a gradual transition from one shade to another. This effect typically involves a lighter color fading into a darker one, or vice versa, but can also encompass a spectrum of colors blending harmoniously. The key to a successful ombre lies in the smooth and almost imperceptible graduation between the chosen hues, resulting in a soft and blended appearance rather than distinct lines of color. Unlike traditional manicures where each nail is typically painted a solid color, ombre nails introduce a dynamic visual element, adding depth and dimension to the fingertips. The beauty of the ombre technique lies in its adaptability; it can be executed using various nail polish formulas, including traditional lacquer, gel polish, and even acrylics, and can be applied horizontally, vertically, diagonally, or even in reverse, opening up a vast array of design possibilities. The subtle yet impactful nature of ombre nails makes them a versatile choice, suitable for both everyday wear and special occasions, effortlessly adding a touch of elegance and style to any look.
3. The Timeless Appeal: Why Ombre Nails Remain Popular
In a landscape of fleeting beauty trends, the enduring popularity of ombre nails speaks volumes about their inherent appeal and versatility. Several factors contribute to their lasting presence in the nail fashion world. Firstly, the visual aesthetic of ombre nails is inherently pleasing to the eye. The smooth transition of colors creates a soft and blended effect that is both elegant and captivating, offering a sophisticated alternative to solid color manicures. This gentle graduation of hues adds a sense of depth and dimension to the nails, making them appear more visually interesting and polished. Secondly, ombre nails offer a remarkable degree of personalization. The choice of colors is virtually limitless, allowing individuals to express their unique style and preferences. Whether opting for subtle nude gradients for a sophisticated look, vibrant neon blends for a bold statement, or delicate pastel transitions for a touch of whimsy, the ombre technique can be tailored to suit any personality and occasion. Furthermore, ombre nails are incredibly versatile, seamlessly transitioning from casual everyday wear to glamorous evening events. The adaptability of the design to different nail shapes and lengths also contributes to its widespread appeal, ensuring that almost anyone can rock an ombre manicure with confidence. Finally, the evolution of application techniques, from simple sponge blending to sophisticated airbrushing, has made ombre nails more accessible and achievable, both in salons and for DIY enthusiasts. This continuous innovation keeps the trend fresh and exciting, ensuring its continued relevance in the ever-evolving world of nail art.
4. DIY vs. Salon: Weighing Your Ombre Options
When it comes to achieving the perfect ombre manicure, you have two primary options: tackling it yourself with a DIY approach or entrusting the task to a professional nail technician at a salon. Both options have their own set of advantages and disadvantages, and the best choice for you will depend on your skill level, available time, budget, and desired outcome. Opting for a DIY ombre manicure can be a cost-effective and personally rewarding experience. It allows for creative freedom and the convenience of working at your own pace. However, it also requires a certain level of dexterity, patience, and the right tools and materials to achieve a seamless blend. The learning curve can be steep for beginners, and achieving a salon-quality finish might take practice. On the other hand, visiting a nail salon offers the expertise and skill of trained professionals who have access to high-quality products and specialized equipment, such as airbrush machines, which can create flawless ombre effects. While this option is generally more expensive, it often results in a longer-lasting and more polished manicure, especially for intricate designs or gel polish applications. Ultimately, the decision between DIY and salon depends on your individual needs and preferences. If you enjoy crafting and are willing to invest time in learning and practicing, DIY ombre nails can be a fun and budget-friendly way to express your style. However, if you prioritize convenience, expertise, and a guaranteed professional finish, a salon appointment might be the better choice.
5. Essential Tools and Materials for DIY Ombre Nails
Embarking on your DIY ombre nail journey requires gathering the right tools and materials to ensure a smooth and successful application. Here's a comprehensive list of essentials you'll need:
- Base Coat: A quality base coat is crucial for protecting your natural nails and providing a smooth surface for the polish to adhere to, ultimately prolonging the life of your ombre manicure.
- Your Chosen Nail Polish Colors: Select at least two contrasting or complementary nail polish colors for your ombre effect. Consider the opacity and consistency of the polishes for easier blending.
- Makeup Sponges: Wedge-shaped makeup sponges are ideal for creating the ombre effect. Opt for fine-pored sponges for a smoother blend and avoid those with large holes. You'll likely need several sponges per manicure.
- Top Coat: A good quality top coat is essential for sealing in your design, adding shine, and protecting your ombre manicure from chipping and wear.
- Liquid Latex or Petroleum Jelly: Applying liquid latex around your cuticles and skin or using petroleum jelly can help prevent the polish from adhering to unwanted areas, making cleanup much easier.
- Nail Polish Remover: Have a bottle of your preferred nail polish remover on hand for correcting mistakes and cleaning up any excess polish.
- Cotton Swabs or Brushes: These will be useful for precise cleanup around the nails after applying the ombre effect.
- Paper Towels or Protective Surface: Protect your work surface from stray polish by laying down paper towels or another protective covering.
- Optional: Nail Art Brush: A fine-tipped nail art brush can be helpful for blending edges or adding subtle details.
Having these essential tools and materials readily available will set you up for a more enjoyable and successful DIY ombre nail experience. Remember to work in a well-ventilated area and take your time to achieve the desired blended effect.
6. The Classic Horizontal Ombre: A Gentle Gradient
The classic horizontal ombre is perhaps the most recognizable and widely embraced style of graduated nail art. This technique involves blending two or more colors across the width of the nail, typically transitioning from a lighter shade at the cuticle to a darker shade at the free edge, or vice versa. The beauty of the horizontal ombre lies in its simplicity and the elegant gradient it creates, adding a subtle yet sophisticated touch to the nails. This style is incredibly versatile and can be adapted to a wide range of color combinations, from soft and subtle nudes to bold and contrasting hues. For a gentle and understated look, consider pairing two shades within the same color family, such as a light baby pink fading into a deeper rose. Alternatively, for a more striking effect, experiment with contrasting colors like a vibrant turquoise blending into a deep navy blue. The horizontal ombre is also a great starting point for beginners venturing into the world of DIY ombre nails, as the technique is relatively straightforward and allows for practice in achieving a smooth and seamless blend. Whether you prefer a subtle and refined aesthetic or a more eye-catching statement, the classic horizontal ombre offers a timeless and elegant way to elevate your manicure.
7. Vertical Ombre: A Lengthening Illusion
While the horizontal ombre blends colors across the width of the nail, the vertical ombre takes a different approach, blending colors along the length of the nail, typically from one side to the other. This technique creates a unique visual effect and can be particularly flattering for those with shorter nail beds, as the vertical gradient can create the illusion of length and elongation. Imagine a soft pastel pink fading into a delicate lavender from the left side of your nail to the right, or a bold crimson seamlessly merging into a deep burgundy along the vertical axis. The vertical ombre offers a more unconventional and often more striking look compared to its horizontal counterpart. It allows for interesting color combinations and can add a touch of modern flair to your manicure. When executing a vertical ombre, it's important to ensure a smooth transition between the colors along the length of the nail to achieve the desired lengthening effect. This technique can be slightly more challenging than the horizontal ombre, as it requires careful blending along a narrower surface area. However, with practice and the right tools, the vertical ombre can be a powerful way to create a visually interesting and elongating nail look that sets you apart.
8. Diagonal Ombre: Adding a Touch of Edge
For those seeking a nail design with a bit more dynamism and flair, the diagonal ombre offers a stylish and eye-catching alternative to the traditional horizontal or vertical gradients. As the name suggests, this technique involves blending colors diagonally across the nail, creating a slanted transition that adds a unique and edgy touch to your manicure. The diagonal ombre can be executed in various ways, with the gradient running from the bottom corner to the opposite top corner, or vice versa. This slanted effect can visually lengthen the nails in a different way than the vertical ombre, drawing the eye along the diagonal line. Experiment with bold color combinations like a vibrant electric blue fading into a deep purple along a sharp diagonal, or opt for a more subtle and sophisticated look with a nude shade blending into a soft taupe. The diagonal ombre offers a fantastic opportunity to play with different color placements and create a manicure that truly stands out. Whether you prefer a subtle diagonal sweep or a more dramatic and pronounced slant, this technique adds a touch of modern sophistication and a hint of rebellious charm to your nail style.
9. Reverse Ombre: Dark to Light at the Tip
The reverse ombre offers a fresh and intriguing twist on the classic gradient, flipping the traditional light-to-dark or dark-to-light transition. In a reverse ombre, the darker shade is typically applied at the base of the nail (cuticle area), gradually fading into a lighter color towards the tip. This creates a visually interesting effect that draws attention to the free edge of the nail and can offer a unique and modern aesthetic. Imagine a deep emerald green at the base seamlessly blending into a shimmering gold at the tips, or a rich burgundy gradually lightening into a soft blush pink. The reverse ombre can be particularly striking and offers a different way to showcase your chosen color palette. It can also be a fun way to play with contrasting textures, such as a matte dark base transitioning into a glossy light tip. This technique requires careful blending to ensure a smooth and even graduation of color, preventing any harsh lines between the darker base and the lighter tip. The reverse ombre is a fantastic option for those looking to experiment with a less conventional ombre style that still maintains an element of elegance and sophistication.
10. Double Ombre: A Symphony of Two Gradients
For the truly adventurous nail art enthusiast, the double ombre takes the gradient concept to a new level of complexity and visual interest. This technique involves creating two distinct ombre gradients on a single nail, often meeting in the middle. For example, you might have a light color fading into a medium shade from the cuticle upwards, while simultaneously having another light color fading into the same medium shade from the free edge downwards. The point where these two gradients meet creates a unique and captivating blended effect. Alternatively, a double ombre could involve two different sets of color gradients on the same nail, creating a more intricate and multi-dimensional look. Imagine a nude base fading into a soft pink in the middle, while a pale blue fades into the same soft pink from the tip. This technique requires precision and careful blending to ensure that the two gradients merge seamlessly and create a harmonious overall design. The double ombre offers a fantastic opportunity to showcase your creativity and create a truly unique and eye-catching manicure that is sure to spark conversation. While it may require more time and skill to execute effectively, the resulting intricate and beautiful blended effect is well worth the effort for those seeking a more advanced and artistic nail style.
11. Glitter Ombre: Sparkling Transitions
For those who love a touch of glamour and sparkle, the glitter ombre is a dazzling way to elevate the classic gradient. This technique involves applying glitter polish in a gradient fashion, typically concentrated at the tips of the nails and gradually fading towards the cuticle, or vice versa. The effect creates a beautiful transition from solid color to shimmering sparkle, adding a touch of magic and festivity to your manicure. You can achieve a glitter ombre by applying a base color and then carefully dabbing or brushing on glitter polish, concentrating the glitter at the desired area and using a sponge or brush to gently blend it out for a gradual fade. Consider pairing a deep jewel-toned base with a coordinating glitter for a luxurious look, or opt for a nude base with a holographic glitter for a more subtle yet captivating sparkle. The glitter ombre is incredibly versatile and can be adapted to various occasions, from everyday sparkle to glamorous evening events. It's also a fantastic way to add a touch of personality and fun to your nails. Whether you prefer a subtle shimmer or a full-on glitter explosion, the glitter ombre offers a dazzling way to make your manicure shine.
12. Chrome Ombre: A Futuristic Sheen
Embrace a modern and futuristic aesthetic with the chrome ombre, a technique that combines the smooth gradient effect with the high-shine, reflective finish of chrome powder. This style creates a captivating and almost metallic transition of color, adding a unique and edgy vibe to your nails. Typically, a base color is applied, followed by the application of a chrome powder using a sponge or applicator, concentrating the powder at one end of the nail and gently blending it out to create a gradient effect. The result is a seamless transition from the base color to a stunning, mirror-like chrome finish. Imagine a deep charcoal gray fading into a brilliant silver chrome, or a rich emerald green seamlessly blending into a dazzling gold chrome. The chrome ombre is a fantastic way to make a bold statement and add a touch of high-fashion glamour to your look. The reflective nature of the chrome powder catches the light beautifully, creating a dynamic and eye-catching effect. While the application of chrome powder requires specific techniques and products, the resulting futuristic and stylish ombre is well worth the effort for those seeking a truly unique and modern manicure.
13. Matte Ombre: Sophisticated Subtlety
For those who prefer a more understated and sophisticated look, the matte ombre offers a chic and subtle alternative to glossy finishes. This technique involves creating a gradient effect using matte nail polishes, resulting in a velvety smooth and non-reflective finish. The absence of shine enhances the softness of the color transition, creating a more muted and elegant aesthetic. Imagine a soft dusty rose fading into a deeper mauve with a completely matte finish, or a creamy beige seamlessly blending into a light gray, both exuding a sense of quiet sophistication. Matte ombre nails are perfect for those who appreciate subtle details and a refined style. The lack of shine can also make the color gradient appear even smoother and more seamless. To achieve a matte ombre, you can either use exclusively matte polishes or apply a matte top coat over a regular ombre manicure. This technique offers a unique and stylish way to embrace the ombre trend with a touch of understated elegance.
14. Neon Ombre: Bold and Vibrant Statements
Make a bold and unforgettable statement with the neon ombre, a vibrant and energetic take on the gradient trend. This technique involves blending bright and electric neon nail polish colors, creating a high-impact and attention-grabbing manicure. Think of a sizzling hot pink fading into a vibrant electric blue, or a shocking lime green seamlessly blending into a bright sunshine yellow. Neon ombre nails are perfect for those who love to stand out and express their playful and energetic personality. The intense pigmentation of neon polishes creates a striking contrast and a visually dynamic effect. When working with neon polishes, it's often helpful to apply a white base coat to make the colors pop even more. The neon ombre is a fantastic choice for summer, parties, or any occasion where you want to add a fun and vibrant touch to your look. Be prepared to turn heads with this bold and energetic nail style.
15. Pastel Ombre: Soft and Dreamy Hues
For a softer and more ethereal aesthetic, the pastel ombre offers a dreamy and delicate take on the gradient trend. This technique involves blending light and airy pastel shades, creating a subtle and romantic manicure. Imagine a delicate baby blue gently fading into a soft lavender, or a pale peach seamlessly blending into a whisper of mint green. Pastel ombre nails evoke a sense of springtime freshness and gentle beauty. The soft and muted tones create a calming and elegant effect that is perfect for everyday wear or special occasions where a touch of understated charm is desired. Pastel ombre can be achieved with various application techniques, ensuring a smooth and seamless transition between the delicate hues. Consider using sheer pastel polishes for an even softer and more blended look. This style is particularly popular during spring and summer months but can be a beautiful choice year-round for those who appreciate a light and airy aesthetic. The subtle gradient of pastel shades adds a touch of visual interest without being overwhelming, making it a versatile and timeless choice.
16. Nude Ombre: Effortless Elegance
For a manicure that exudes effortless elegance and sophistication, the nude ombre is a perfect choice. This technique involves blending different shades within the nude color family, creating a subtle and seamless gradient that enhances the natural beauty of the nails. Imagine a light beige at the cuticle gently fading into a warmer tan at the tips, or a soft blush pink seamlessly blending into a creamy ivory. Nude ombre nails are incredibly versatile and complement any skin tone and outfit. They offer a polished and refined look without being overly bold or distracting. The subtle graduation of nude shades adds depth and dimension to the nails while maintaining a clean and classic aesthetic. This style is ideal for professional settings, everyday wear, or for those who prefer a more minimalist approach to nail art. The key to a beautiful nude ombre lies in selecting nude shades that complement your skin tone and ensuring a smooth and seamless blend between the chosen colors. This understated yet chic style proves that sometimes, less is truly more when it comes to nail design.
17. French Ombre (Baby Boomer Nails): A Modern Twist on a Classic
The French ombre, often referred to as "Baby Boomer" nails, is a modern and softer interpretation of the classic French manicure. Instead of a stark white tip, the French ombre features a gradual and seamless blend of the nude or pink base color into a soft white or off-white at the free edge. This creates a more natural and blended look, eliminating the harsh line that can sometimes be associated with traditional French tips. The transition between the base color and the white tip is smooth and subtle, giving the nails a soft and elegant appearance. French ombre nails are incredibly popular for their timeless appeal and their ability to elongate the fingers. They are versatile enough for any occasion, from everyday wear to formal events, and offer a sophisticated and polished finish. Achieving the perfect French ombre often involves techniques like sponging or airbrushing to create that seamless blend. This modern twist on a beloved classic offers a softer, more contemporary, and universally flattering nail style.
18. Water Marble Ombre: Unique and Artistic Blends
For a truly unique and artistic ombre effect, the water marble technique can create stunning and unpredictable blended designs. This method involves dropping different nail polish colors into a container of water and then using a tool to swirl and create intricate patterns on the surface. The nail is then carefully dipped into the water to transfer the design onto the nail plate. When executed with a focus on creating a gradient effect, the water marble technique can result in beautiful and organic ombre blends that are unlike any other. Imagine swirls of deep blues and teals merging together in a fluid gradient, or vibrant pinks and purples intertwining to create a mesmerizing blended effect. Each nail will have a completely unique design, making your manicure a true work of art. While the water marble technique can be a bit messy and requires practice to master, the resulting artistic and ombre-like blends are often worth the effort for those seeking a truly one-of-a-kind nail look.
19. Airbrush Ombre: Seamless and Professional Finishes
For the most seamless and professional-looking ombre effect, airbrushing is often the preferred technique in salons. An airbrush machine uses compressed air to spray fine mists of nail polish onto the nails, allowing for incredibly smooth and gradual color transitions. This method is particularly effective for creating flawless gradients with multiple colors. The fine control offered by airbrushing allows for precise placement and blending of the polishes, resulting in a soft and almost ethereal ombre effect. While airbrushing typically requires specialized equipment and training, the results are often unmatched in terms of smoothness and blendability. Whether you're looking for a subtle two-tone gradient or a more complex multi-colored ombre, airbrushing can achieve a professional and high-quality finish that is difficult to replicate with traditional sponging techniques. If you're seeking a truly seamless and salon-worthy ombre manicure, airbrushing is a technique to consider.
20. Ombre with Nail Art Accents: Elevating the Design
Once you've achieved a beautiful ombre base, you can further elevate your nail design by adding nail art accents. This allows you to combine the stylish gradient effect with additional decorative elements, creating a truly personalized and eye-catching manicure. Consider adding delicate floral decals to a pastel ombre, or geometric patterns to a bold neon gradient. You could also incorporate glitter accents strategically placed at the transition point of the ombre, or add subtle stamping designs over the blended colors. The possibilities are endless when it comes to combining ombre with nail art. The ombre base provides a beautiful backdrop for showcasing intricate designs or adding a touch of extra flair. Whether you prefer subtle and delicate accents or more bold and statement-making nail art, incorporating these elements over your ombre manicure is a fantastic way to express your creativity and create a truly unique and stylish look.
21. Caring for Your Ombre Manicure: Longevity Tips
To ensure that your beautiful ombre manicure lasts as long as possible, proper care and maintenance are essential. Here are some key tips to prolong the life of your graduated and blended design:
- Apply a Quality Top Coat: A good top coat is your first line of defense against chipping and wear. Apply a generous layer over your finished ombre design and reapply every two to three days to maintain shine and protection.
- Avoid Harsh Chemicals: Wear gloves when doing household chores that involve harsh chemicals, such as cleaning products, as these can dull the polish and cause damage.
- Moisturize Regularly: Keep your hands and cuticles moisturized with a good quality cuticle oil and hand cream. This helps to keep your nails healthy and prevents the polish from drying out and becoming brittle.
- Be Gentle with Your Nails: Avoid using your nails as tools to scrape or pick at things, as this can lead to chipping and breakage.
- File Snags Immediately: If you notice any small snags or rough edges, gently file them down with a fine-grit nail file to prevent further damage.
- Avoid Soaking Your Nails for Extended Periods: Prolonged exposure to water can cause the nail polish to lift or become soft. Wear gloves when doing dishes or gardening.
- Proper Removal: When it's time to remove your ombre manicure, use a gentle and acetone-free nail polish remover to avoid drying out your nails. For glitter or stubborn polishes, try the soak-off method with cotton balls and foil.
- Consider Gel Polish: If you're looking for a longer-lasting ombre manicure, consider opting for gel polish, which is cured under a UV or LED lamp and can last for several weeks without chipping.
By following these care tips, you can help to keep your ombre nails looking fresh, vibrant, and stylish for longer, allowing you to enjoy your beautiful graduated design to its fullest.
22. Choosing the Right Color Combinations for Your Ombre
The beauty of ombre nails lies in the endless possibilities when it comes to color combinations. Selecting the right hues can significantly impact the overall look and feel of your manicure. Here are some factors to consider when choosing your ombre color pairings:
- Complementary Colors: Colors that are opposite each other on the color wheel (e.g., blue and orange, red and green, yellow and purple) can create a striking and vibrant contrast in an ombre design.
- Analogous Colors: Colors that are adjacent to each other on the color wheel (e.g., blue, blue-green, and green; pink, red, and orange) create a harmonious and soft gradient.
- Monochromatic Colors: Using different shades and tints within the same color family (e.g., light pink, medium pink, and deep pink) results in a subtle and sophisticated ombre.
- Nude Variations: Blending different shades of nude polish can create an elegant and natural-looking ombre that complements any skin tone.
- Consider the Occasion: For everyday wear, you might opt for more subtle or neutral color combinations. For special events or parties, you might choose bolder and more vibrant hues or add glitter.
- Think About Your Personal Style: Your nail color choices should reflect your personal style and preferences. Don't be afraid to experiment with different combinations to find what you love.
- Seasonal Trends: You can also draw inspiration from seasonal color palettes. For example, warm earth tones in the fall, cool blues and silvers in the winter, vibrant pastels in the spring, and bright neons in the summer.
- Test it Out: If you're unsure about a color combination, try painting a small swatch on a piece of paper or an artificial nail to see how the colors blend together before applying them to your full manicure.
Ultimately, the best color combinations for your ombre nails are the ones that you love and that make you feel confident and stylish. Don't be afraid to step outside of your comfort zone and experiment with different hues to discover your favorite ombre looks.
23. Ombre Nails for Different Nail Shapes and Lengths
One of the great advantages of ombre nails is their versatility in adapting to various nail shapes and lengths. Whether you have short and round nails, long and stiletto-shaped nails, or anything in between, there's an ombre style that will look fantastic on you.
- Short Nails: For shorter nails, consider vertical or diagonal ombre designs to help create the illusion of length. Avoid overly busy or multi-colored horizontal ombre designs that might make the nail bed appear even shorter. Softer color combinations can also be more flattering on shorter nails.
- Long Nails: Longer nails offer more surface area to play with, allowing for more intricate and multi-colored ombre designs. Horizontal ombre gradients look particularly striking on longer nails, showcasing the full transition of colors. You can also experiment with reverse ombre or double ombre styles.
- Square Nails: Square-shaped nails provide a clean and modern canvas for ombre designs. Both horizontal and vertical gradients work well with this shape. Consider bold color combinations for a strong and stylish look.
- Round Nails: The soft curves of round nails complement gentle and blended ombre designs. Pastel or nude ombre gradients can enhance the natural elegance of this shape. Avoid harsh or overly geometric ombre styles.
- Oval Nails: Oval-shaped nails are versatile and can carry most ombre styles beautifully. Horizontal, vertical, and diagonal gradients all work well, allowing for a wide range of color combinations and design possibilities.
- Almond and Stiletto Nails: These elongated and tapered shapes are perfect for showcasing dramatic ombre effects. Bold color contrasts, glitter accents, and reverse ombre designs can look particularly striking on these nail shapes.
Ultimately, the key is to choose an ombre style and color combination that you love and that makes you feel confident. Don't be afraid to experiment and find what works best for your individual nail shape and length.
24. The Influence of Trends on Ombre Nail Styles
Like all aspects of fashion and beauty, ombre nail styles are also influenced by current trends. While the basic concept of a color gradient remains consistent, the specific color palettes, finishes, and embellishments often evolve with the changing seasons and broader fashion movements.
- Color Trends: Runway fashion and popular color forecasts often dictate the trending hues for ombre nails. For example, during a season where jewel tones are popular, you might see a rise in emerald green and sapphire blue ombre designs.
- Finish Trends: The popularity of different nail polish finishes, such as matte, chrome, holographic, or glitter, also impacts ombre styles. A matte ombre might be trendy one season, while a high-shine chrome ombre could be the must-have look the next.
- Nail Art Integration: Current nail art trends, such as minimalist designs, geometric patterns, or floral accents, often get incorporated into ombre manicures, creating fresh and contemporary looks.
- Social Media Influence: Platforms like Instagram and Pinterest play a significant role in showcasing and popularizing new ombre nail trends. Viral designs and innovative color combinations can quickly gain traction and inspire nail enthusiasts worldwide.
- Seasonal Adaptations: Ombre nail styles often adapt to the changing seasons, with warmer and brighter colors being popular in spring and summer, and richer, deeper tones dominating in fall and winter.
Staying informed about current beauty and fashion trends can provide inspiration for your next ombre manicure. However, it's also important to remember that personal style and preference should always be the primary guiding factors when choosing your nail design. Trends can be a fun way to experiment and try new things, but ultimately, the best ombre style is the one that makes you feel confident and stylish.
25. Stepping Up Your Ombre Game: Advanced Techniques
Once you've mastered the basic ombre techniques, you can explore more advanced methods to create even more intricate and professional-looking graduated designs. Here are a few techniques to consider:
- Multiple Sponge Layers: Instead of just one layer of blended polish, try applying multiple thin layers with the sponge, allowing each layer to partially dry before applying the next. This can create a smoother and more gradual transition of color.
- Fan Brush Blending: A clean, dry fan brush can be gently swept across the transition line between colors to soften the blend and create a more diffused effect.
- Layering Sheer Polishes: Using sheer polishes in your ombre design can create a very subtle and blended look. Layer different sheer shades over each other to build up the gradient.
- Reverse Stamping: Apply an ombre gradient to a nail stamper head and then transfer the design onto your nail for a unique and precise ombre effect.
- Ombre with Texture: Incorporate textured polishes or powders into your ombre design to add another dimension to your manicure. For example, you could create a glitter fade over a textured base.
- Advanced Airbrushing Techniques: If you have access to an airbrush, explore more complex techniques like creating multi-directional gradients or incorporating stencils for detailed ombre designs.
- Color Blocking with Ombre: Combine solid blocks of color with ombre gradients for a bold and graphic nail art look.
Experimenting with these advanced techniques can take your ombre nail art skills to the next level and allow you to create truly unique and professional-quality manicures. Don't be afraid to try new things and push the boundaries of your creativity.
Conclusion: Embrace the Endless Possibilities of Ombre Nails
The world of ombre nails is a vibrant and ever-evolving landscape, offering a seemingly endless array of styles, techniques, and color combinations to explore. From the subtle elegance of a nude gradient to the bold statement of a neon blend, the ombre technique provides a versatile canvas for expressing your individual style and creativity. Whether you're a DIY enthusiast experimenting with sponges and brushes or prefer the flawless finish of a salon airbrush, the beauty of ombre lies in its ability to transform your fingertips into miniature works of art. With over 150+ ideas just scratching the surface of the possibilities, we encourage you to embrace the graduated and blended designs and discover your own signature ombre look. So, dive into the world of seamless transitions, experiment with captivating color pairings, and let your nails become a stylish reflection of your unique personality. The allure of ombre is timeless, and its potential for innovation is boundless – the only limit is your imagination.
FAQS: Your Burning Ombre Questions Answered
-
What is the easiest way to do ombre nails at home?
The easiest way to achieve a basic ombre effect at home is by using a makeup sponge. Apply stripes of your chosen nail polish colors onto the sponge, slightly overlapping them. Then, gently dab the sponge onto your nail, repeating the process until you achieve the desired gradient. Finish with a top coat. -
How do I get a smooth transition in ombre nails?
Achieving a smooth transition requires careful blending. Use a fine-pored makeup sponge and avoid applying too much polish at once. Gently dabbing the sponge multiple times, slightly overlapping the colors, will help to create a seamless blend. You can also use a clean, dry fan brush to lightly sweep across the transition line to soften it. -
What are the best color combinations for ombre nails?
The best color combinations depend on your personal preference and the look you want to achieve. Some popular options include monochromatic gradients (different shades of the same color), analogous colors (colors next to each other on the color wheel), complementary colors (colors opposite each other on the color 1 wheel for a bolder contrast), and nude variations for a subtle and elegant look. -
How long do ombre nails typically last?
The longevity of your ombre manicure depends on the type of polish used and how well you care for your nails. With regular nail polish and a good top coat, you can expect your ombre to last for about 3-7 days before chipping. Gel polish ombre manicures, when applied and cared for properly, can last for 2-3 weeks. -
Can you do ombre nails on short nails?
Yes, you can definitely do ombre nails on short nails! Vertical or diagonal ombre designs can be particularly flattering on shorter nails as they can help to create the illusion of length. Opt for softer color combinations and avoid overly busy designs.